
Difficulty | Easy 📖
First of all, welcome to the Daft Software tech blog. Here we share here tips, tricks, tutorials and for things and matters relating to Unreal Engine and all else.
All things shared in this blog are free to use on your commercial or non-commercial projects, If I saved you some time or helped, feel free to put us in your game credits as Daft Software or Daft Software Ltd.
Today we will discuss setting up your own blog, and all the steps that it took to setup the one you are reading now! Below is a vague outline of the things we are going to cover.
- Domain Name Setup - Paid (Optional)
- Github Repo + Theme Setup - Free
- Locally hosting Hugo - Free
- Hosting via Cloudflare Pages - Free
Prerequisite Skills:
- Know atleast the basics of how the internet works
- Know atleast the basics of how a terminal works (powershell, bash, whatever)
- Know atleast the basics of github & git
Domain Names (Optional)
First things first - a part people often don’t cover or assume you know how is domains, I think because people from older generations just sort of assume this is common knowledge having grown up with the internet. It’s also quite incredible the amount of blogs hosted on github pages that just have the generic .github url on it. Granted, while it has some benefits such as easily being able to find a blog for a given github account and being free, I also just think there’s something nice about having a proper domain name attached to your blog that looks a bit more professional.
Feel free to skip this step if you are happy using a mypage.pages.dev domain name instead.
What actually is a domain?
Incase you don’t know what a domain name is, in laymans terms it’s essentially just an alias for an ip address, your real server has an ipv4 address like 216.58.212.228 and then you have a domain name eg www.google.com which routes to this real ip address. You can see for yourself which ip a domain points to by doing traceroute on unix or tracert on windows, which will show you the hops it took to reach the destination host and which places it went to on the way there, you will see for example something like this:
traceroute www.google.com
traceroute to www.google.com (216.58.212.228), 64 hops max, 52 byte packets
 1  192.168.0.1 (192.168.0.1)  4.648 ms  3.135 ms  3.110 ms
 2  * * *
 3  80.255.197.40 (80.255.197.40)  19.717 ms  16.514 ms  34.266 ms
 4  * * *
 5  eislou2-ic-4-ae0-0.network.virginmedia.net (62.254.59.130)  125.000 ms  120.685 ms  134.069 ms
 6  142.250.160.116 (142.250.160.116)  125.985 ms  124.837 ms  125.091 ms
 7  * * *
 8  209.85.252.180 (209.85.252.180)  26.762 ms
    142.251.54.48 (142.251.54.48)  19.375 ms
    142.251.52.144 (142.251.52.144)  21.193 ms
 9  192.178.98.4 (192.178.98.4)  18.977 ms
    192.178.97.94 (192.178.97.94)  22.744 ms
    192.178.98.6 (192.178.98.6)  27.194 ms
10  ams16s22-in-f4.1e100.net (216.58.212.228)  18.902 ms  19.923 ms  19.694 ms
The setup
So the first thing to note here is, having a domain name generally isn’t free, but can be a very inexpensive yearly cost, depending on the domain name that you buy. I would generally recommend namecheap for buying your domain since I find them to have quite a nice dashboard and generally I haven’t ever had problems with them. As far as I have seen they don’t do shady practices like increasing prices of domains based on your page visits or cookies. So for this tutorial we will be using namecheap, but you don’t have to.
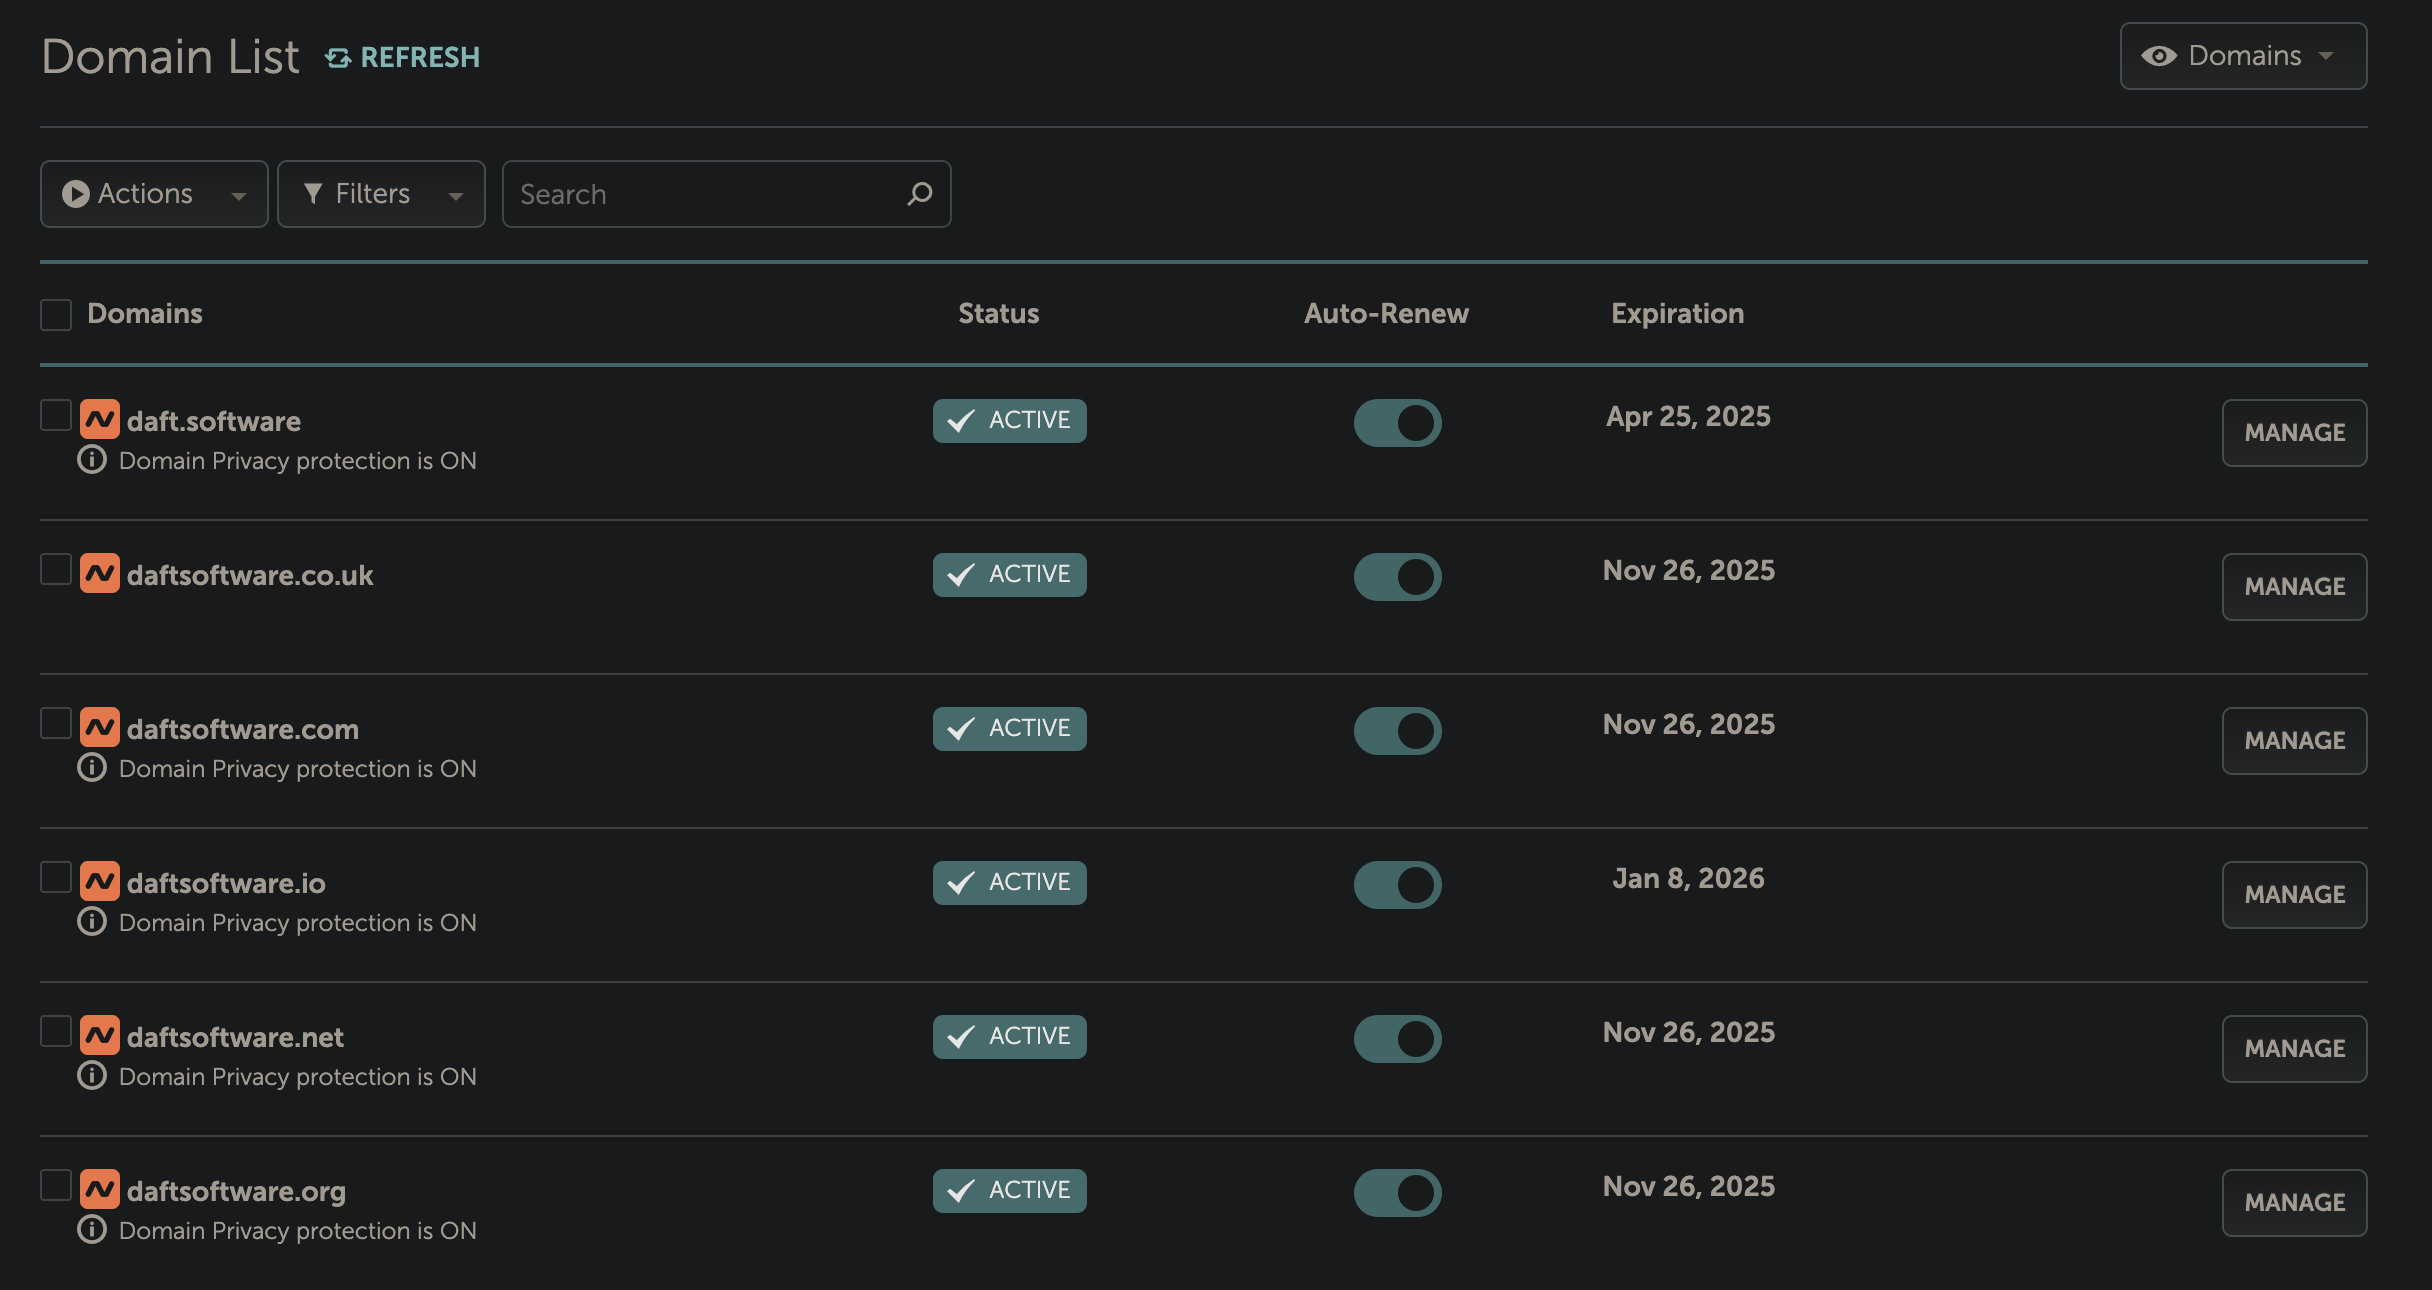
Once you’ve gone over to namecheap and found a domain, or multiple that you liked, purchased them and then signed up for an account, if you go to the account dashboard you should see your nice new domains sitting there. I would recommend setting these to auto-renew so you don’t lose them after a year, and you can withhold them for privacy which will hide all of your real contact details on whois lookups, which are designed for showing who owns a domain, if you withhold it will show namecheap as the owner rather than yourself, bots like to scrape these details to send you annoying spam so i recommend you turn that setting on as it’s free. You also have an option for Premium DNS which you do not need, so don’t buy this.
Now for the important bit, we will move the actual domain server over to cloudflare, this doesn’t remove our domain from namecheap, they will still be the registrar and who actually holds the domain for you and where you pay money to, cloudflare simply will host the domain on their service, giving you additional security like ddos protection and faster routing among other things.
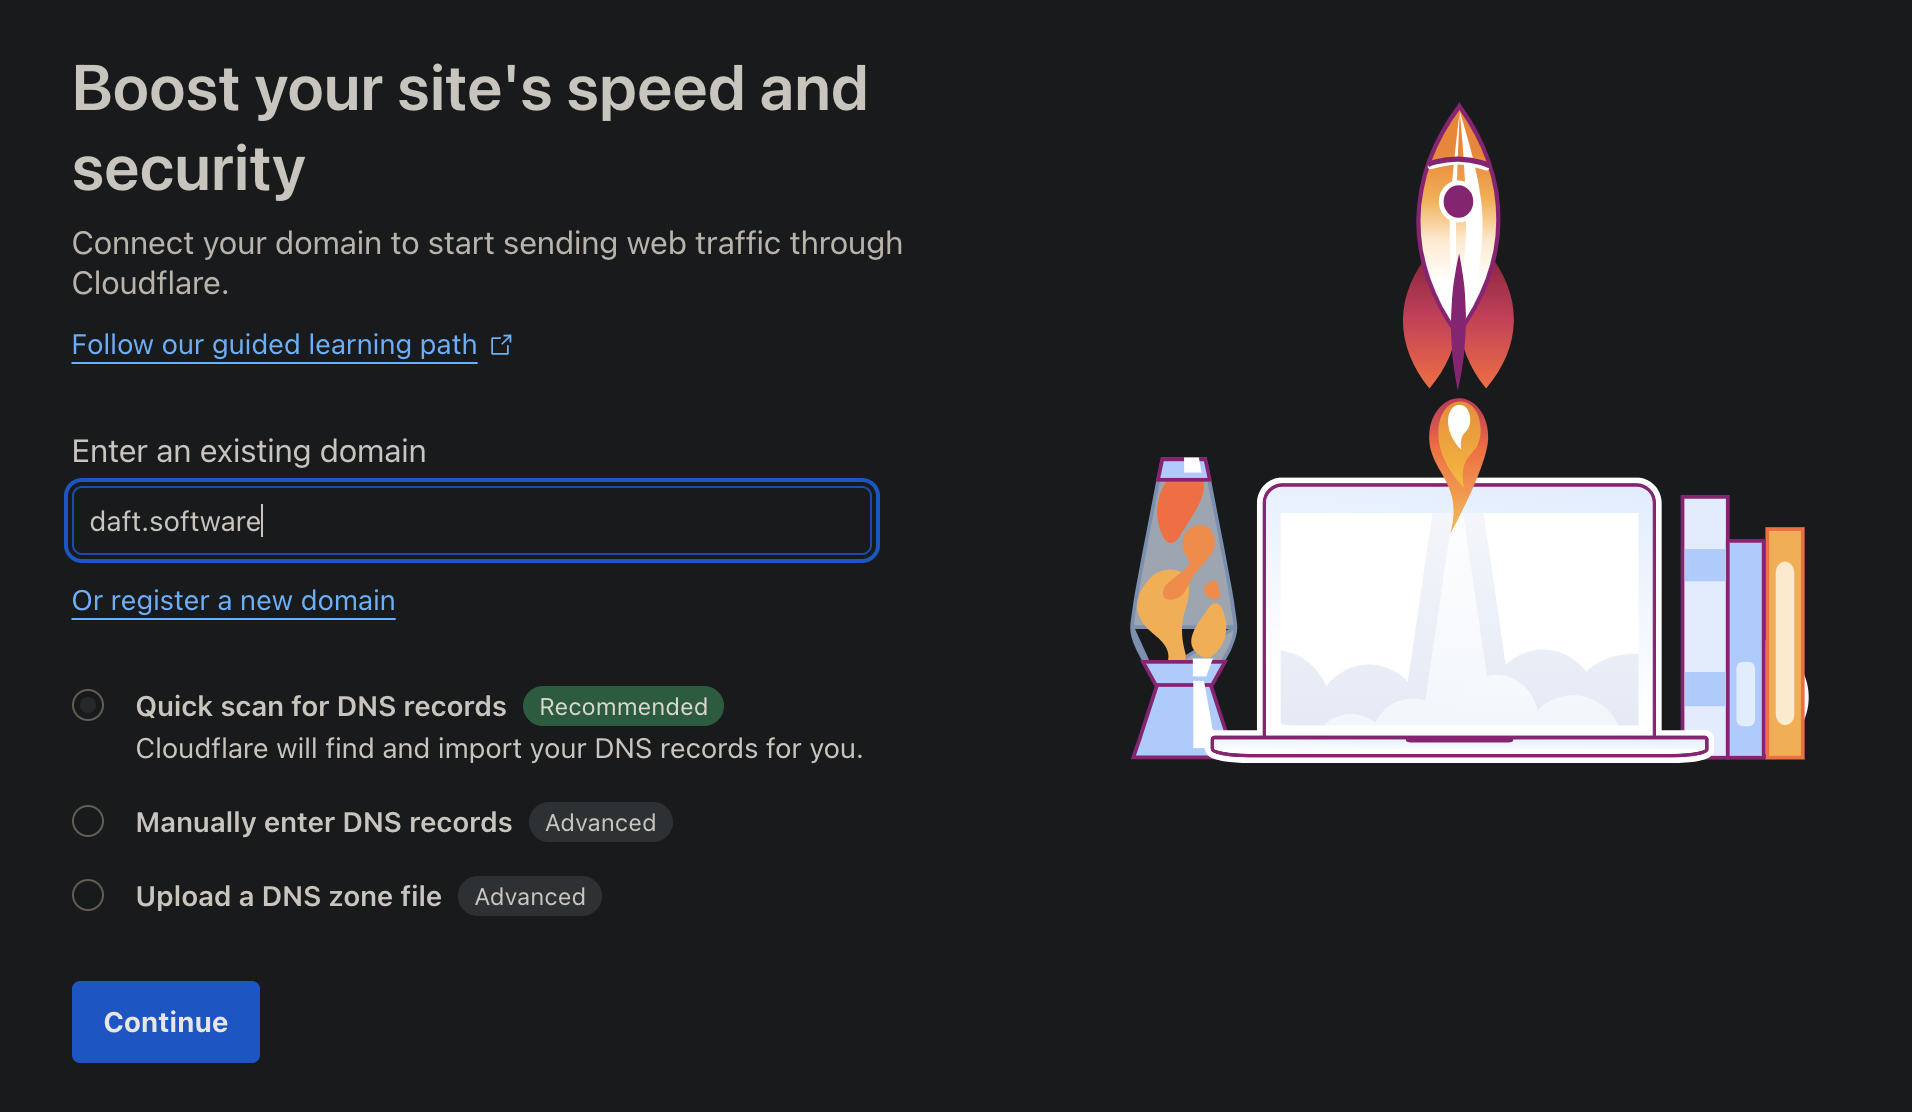
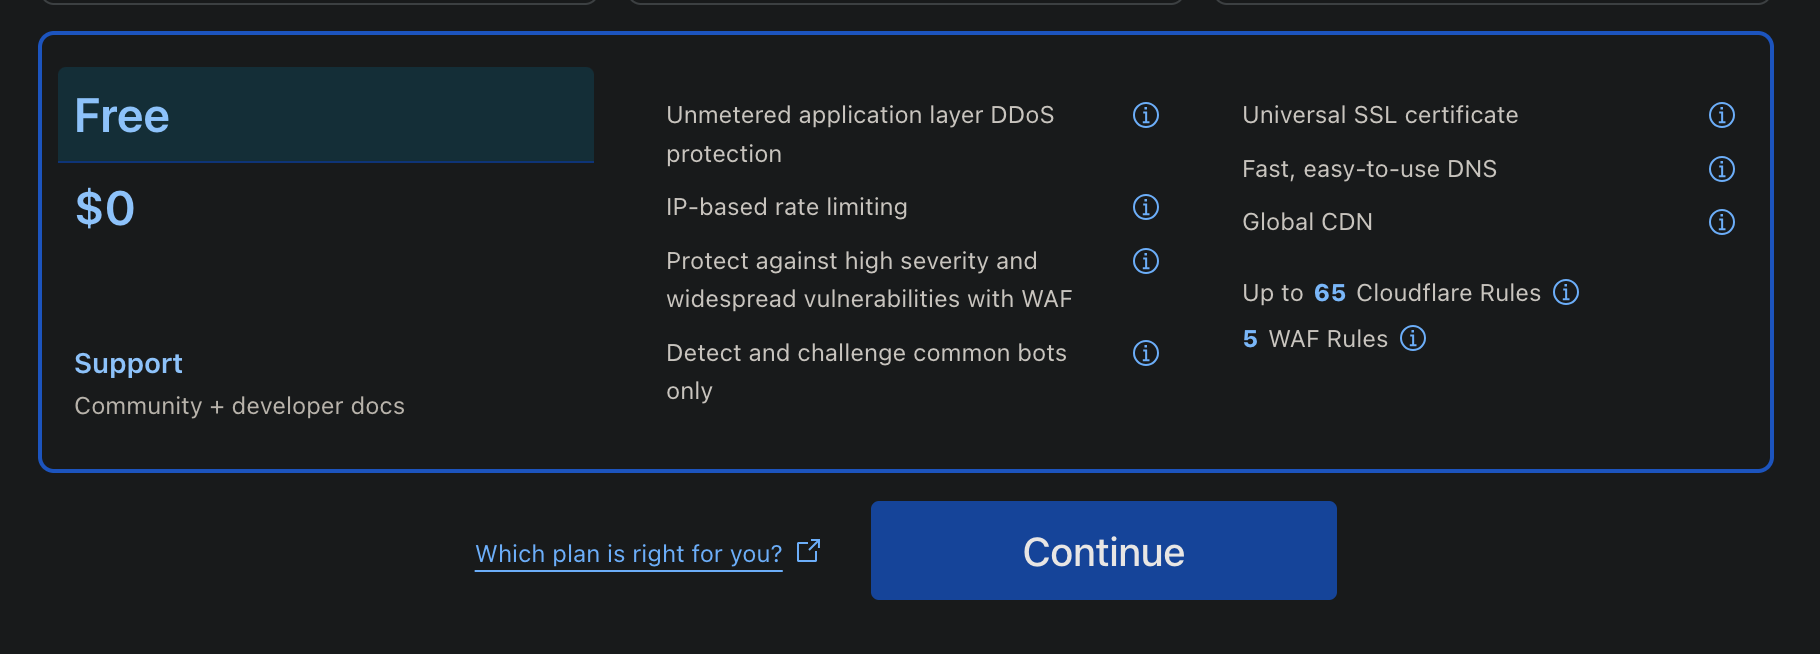
To set this up, you must go to cloudflare, sign up for an account, and then on the dashboard there’s an “add a domain” button. Enter the domain you purchased in namecheap, then enable “Quick scan for DNS records”. press continue and then select the “Free” pricing plan at the bottom.
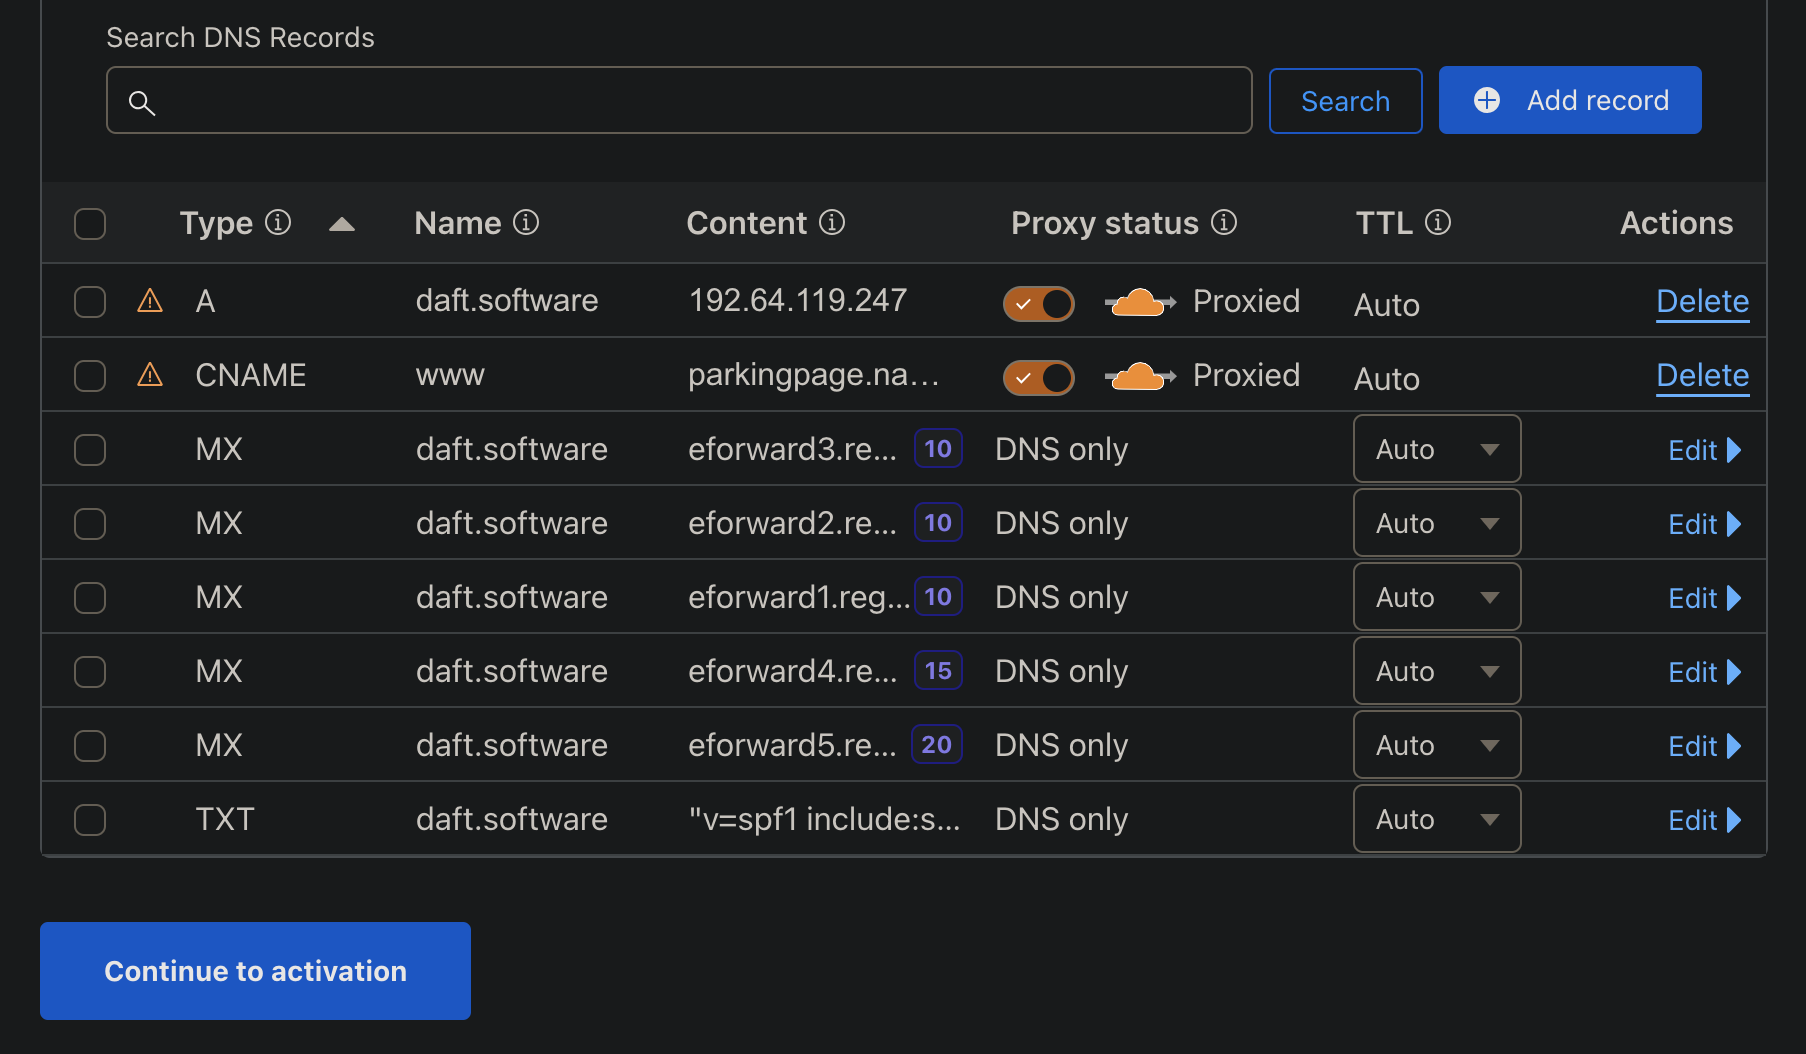
Once this process is finished, cloudflare will have located all of the records to migrate from namecheap, so now you need to press continue to activation, cloudflare will provide you two nameservers, which in the namecheap dashboard, you can enter by clicking manage on your domain, changing the nameservers dropdown from Namecheap BasicDNS to Custom DNS, and now entering both of the nameservers that cloudflare provided you into each box and pressing the green check to save. Namecheap doesn’t enable DNSSEC by default so you can safely ignore this. And that’s it! you’ve migrated your DNS nameserver to cloudflare.

Choosing a theme for Hugo
Firstly, you’re going to want to create a GitHub account. If you haven’t already, you’re also going to want to install git.
Now for the fun part, we get to pick a theme. Generally any hugo theme should be compatible so long as we identify which hugo version it requires us to use. But I definitely recommend using one which is well maintained, you can see this generally by just looking at the git history and seeing that the last change wasn’t something like 2 years ago.
You can find a theme generally anywhere, but I can recommend just looking at some of them available at https://themes.gohugo.io/ or just on github with the “Use this template” button since this streamlines making a private fork. Otherwise you can do so manually, and make a private fork from a public repo but it’s a more advanced git workflow.
I ended up going with Stack by Jimmy Cai, and you should make sure to use the starter and not the theme directly. Click “Use this template” to make a private repo, or otherwise you can just fork it publically.
To manually make a private repo, create a new private repo, clone it with you will have a private fork and master of hugo-theme-stack-starter has been pushed into main.
git clone [email protected]:daftsoftware/blog.daftsoftware.com.git
git remote add upstream [email protected]:CaiJimmy/hugo-theme-stack-starter.git
git fetch upstream
git pull upstream master
git push origin --force
If you didn’t make a private fork you just need to clone your repository.
Locally hosting our Hugo Site
Now we have our repo nicely cloned, you need to install hugo and we can get started.
If we open a terminal and cd into our repo, you can simply do hugo server to start a locally hosted server for testing, the output of this command will give us the localhost url to see our site. When we do this in our cloned repository, you will see our theme is there!
Adding content
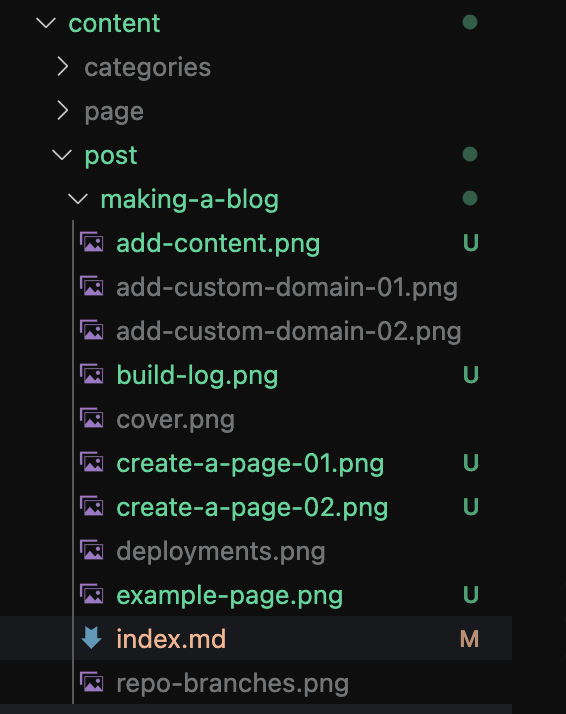
I can recommend vscode for this purpose, and just dragging the entire repo folder into vscode to make your life easier. The main folder we are concerned with is content/post as this is where all of our blog posts are going to live, and you can nicely edit these as simple .md files.
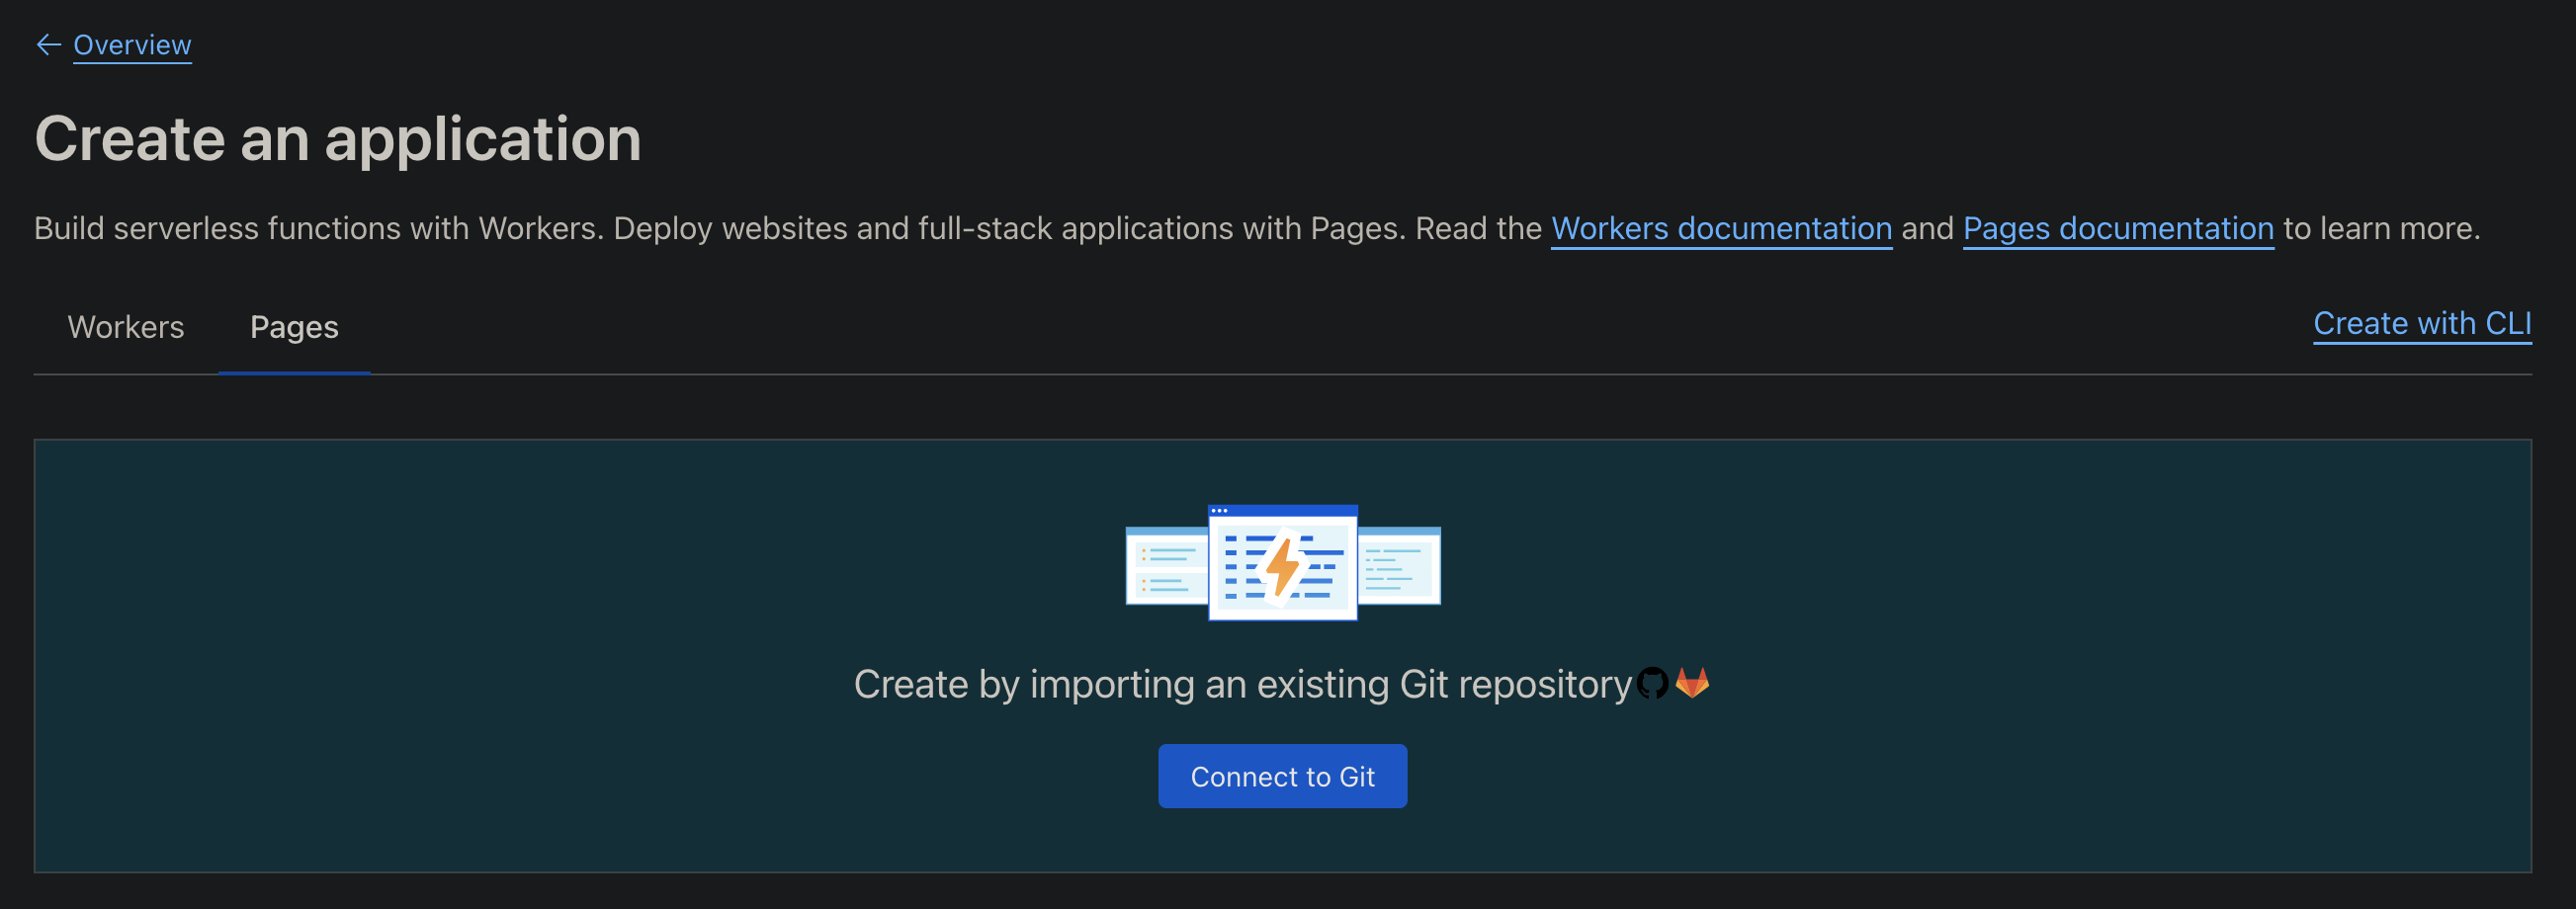
Hosting on Cloudflare Pages
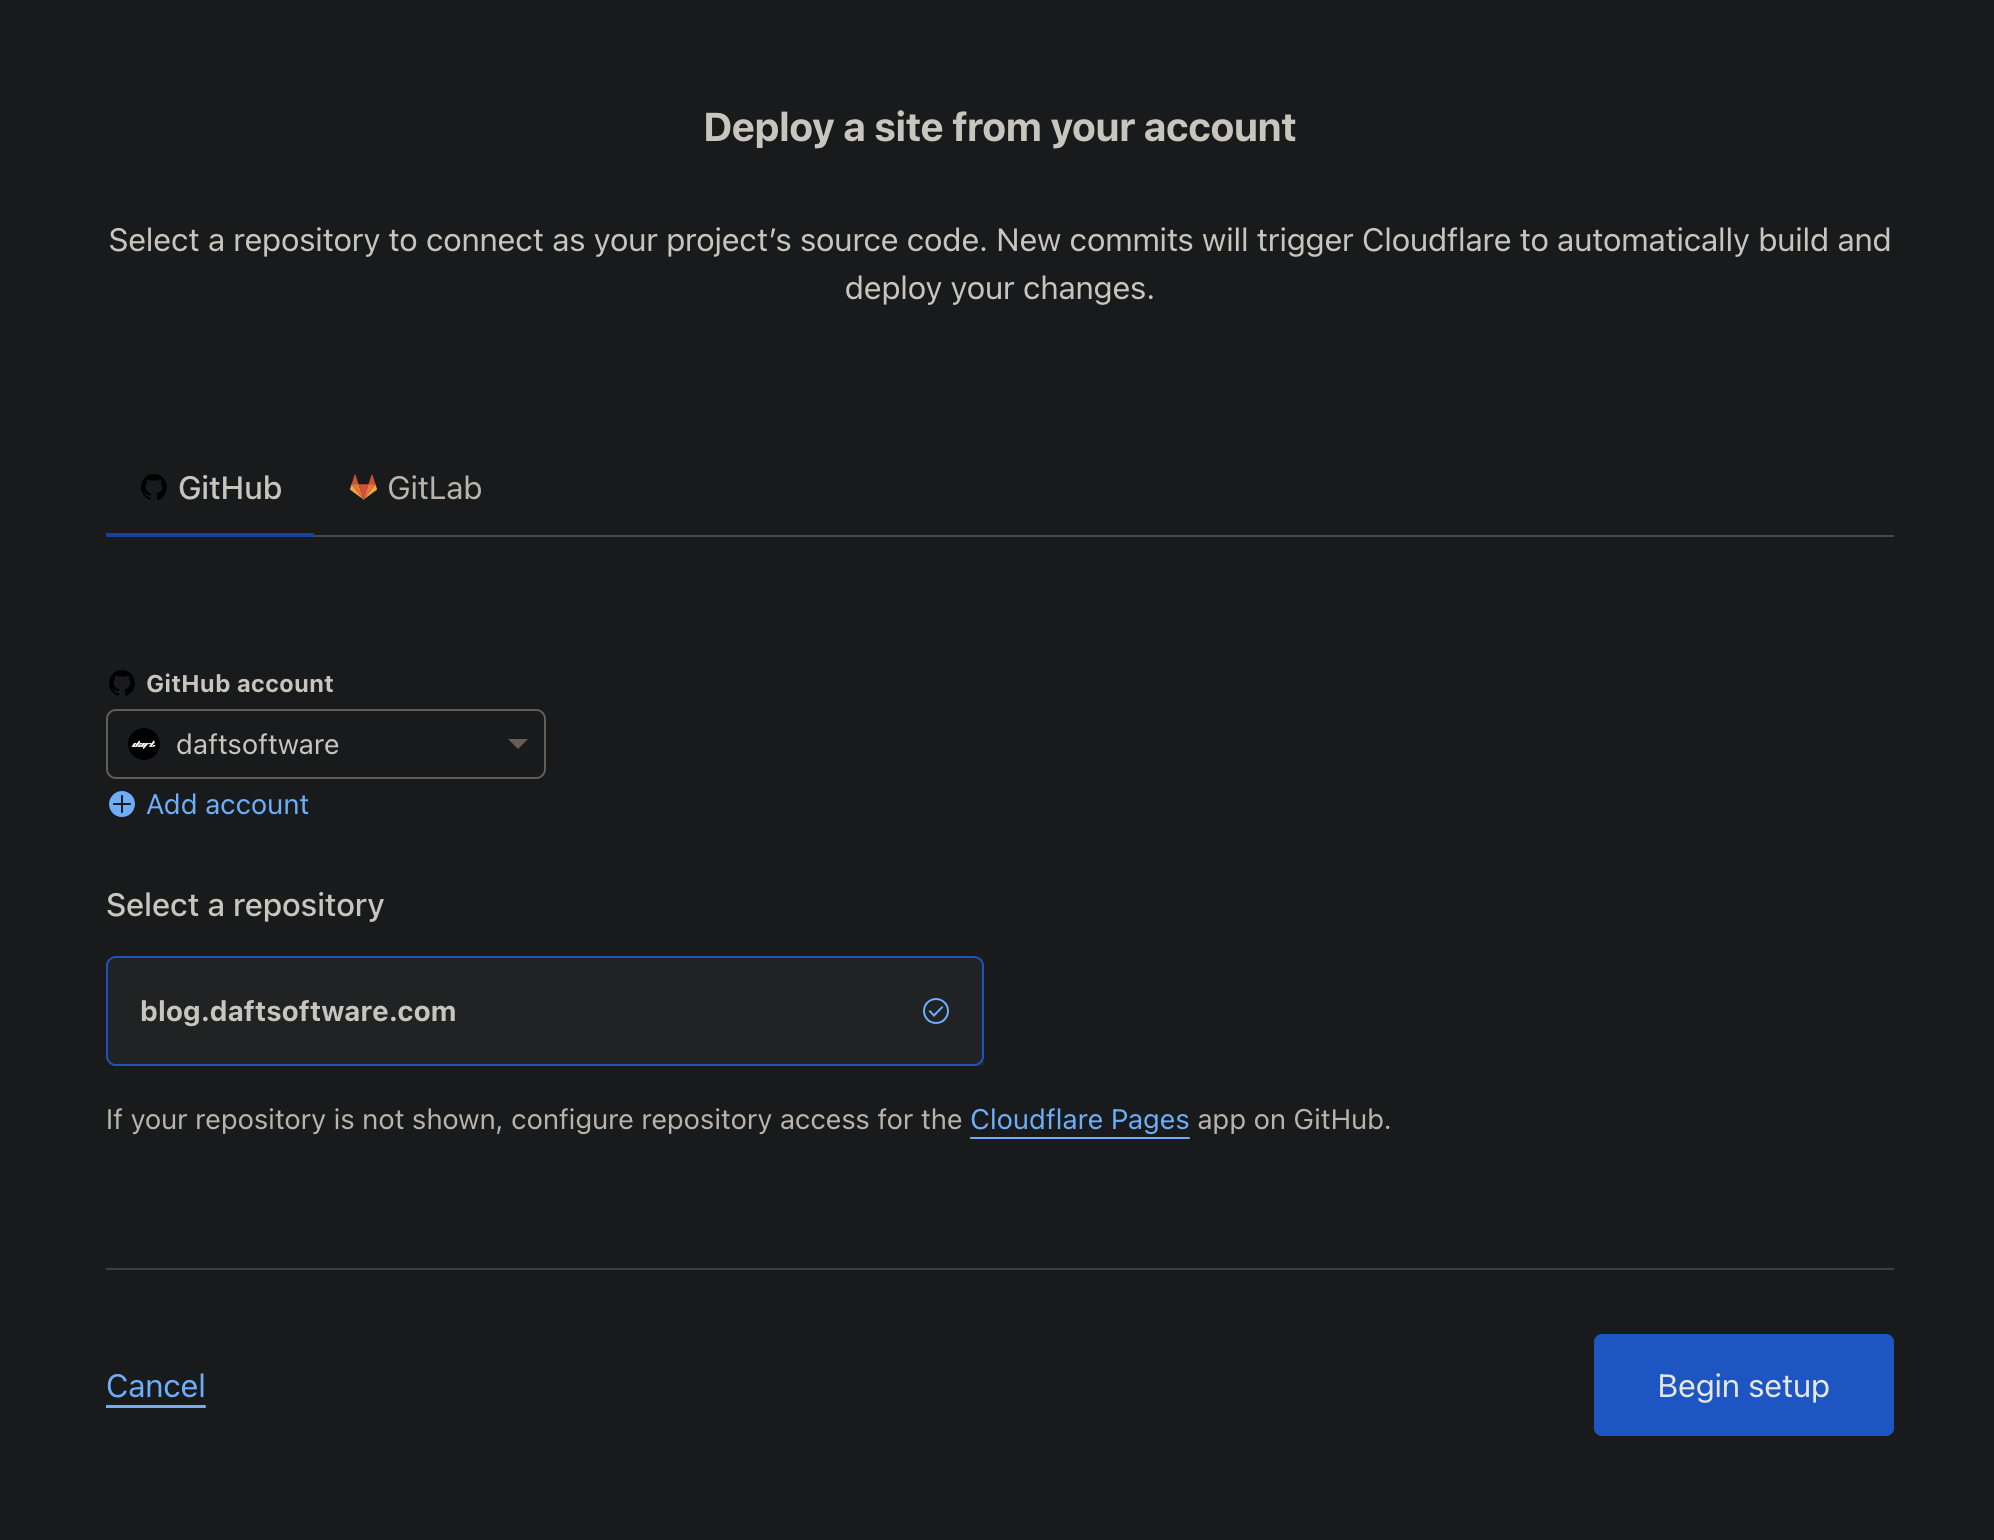
Navigate over to Cloudflare Pages on the cloudflare dash and you should see 2 options “Workers” and “Pages”, if you click on pages, go ahead and press the “Connect to Git” button. You’re then going to want to select GitHub and add your account and repository, for security reasons i’d probably recommend just giving it access to the specific repo which contains your hugo site.
Now we should “Select a repository” and click our repo - it’s very unobvious these are actually buttons, but when you click it will have a check next to it. And press “Begin setup”.
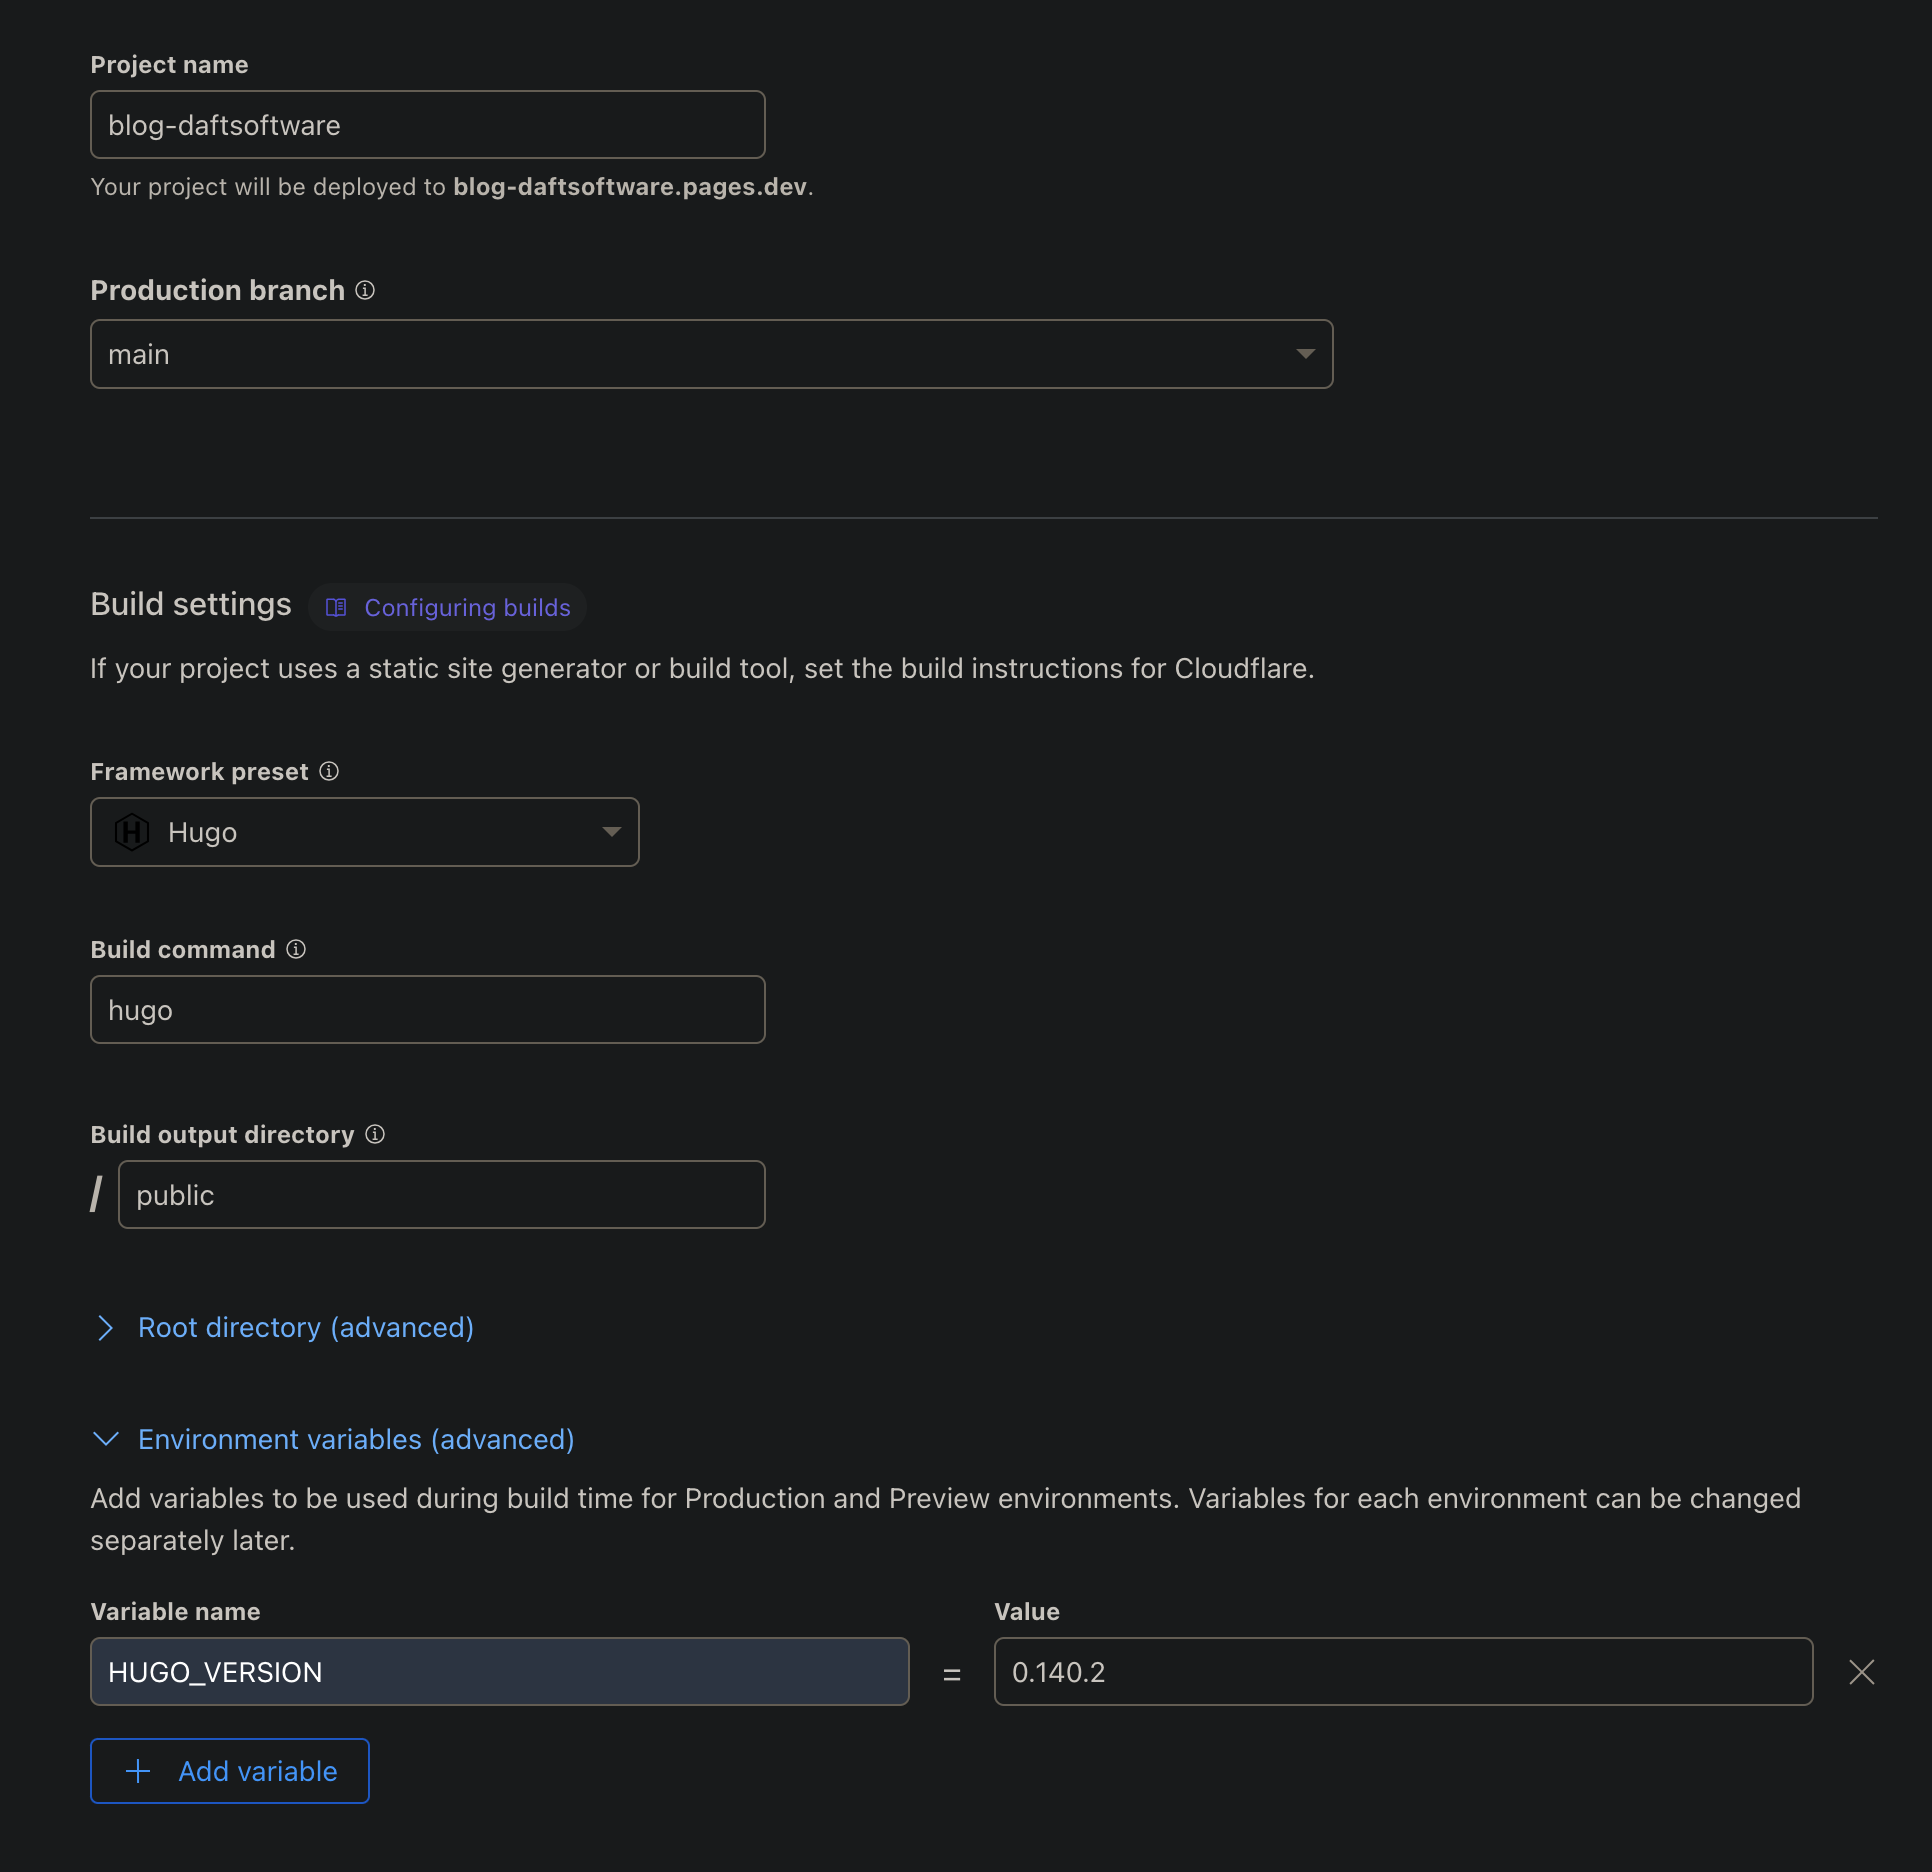
Now the very important part here is your project name, as if you skipped the domain setup from earlier, this is going to be the main domain your access your site from - aka daftsoftware.pages.dev, select your branch, which generally should be master or main.
Now we need to setup the Build settings. There is a very IMPORTANT step here, that is easy to miss. You should set your Framework preset to “Hugo”, which should automatically set Build command and the Build output directory to Public. However, an extra setting that we will need is to setup an Environment variable for HUGO_VERSION, without this it is extremely likely that our site when building will just throw an obtuse undetailed error and then die on the spot due to defaulting to an extremely outdated version of hugo, rather than the latest.
Head over to hugo releases on github and check the latest version or the one supported by your theme, eg “0.140.2” is the latest at the time of reading this. So the final thing should look like the following:
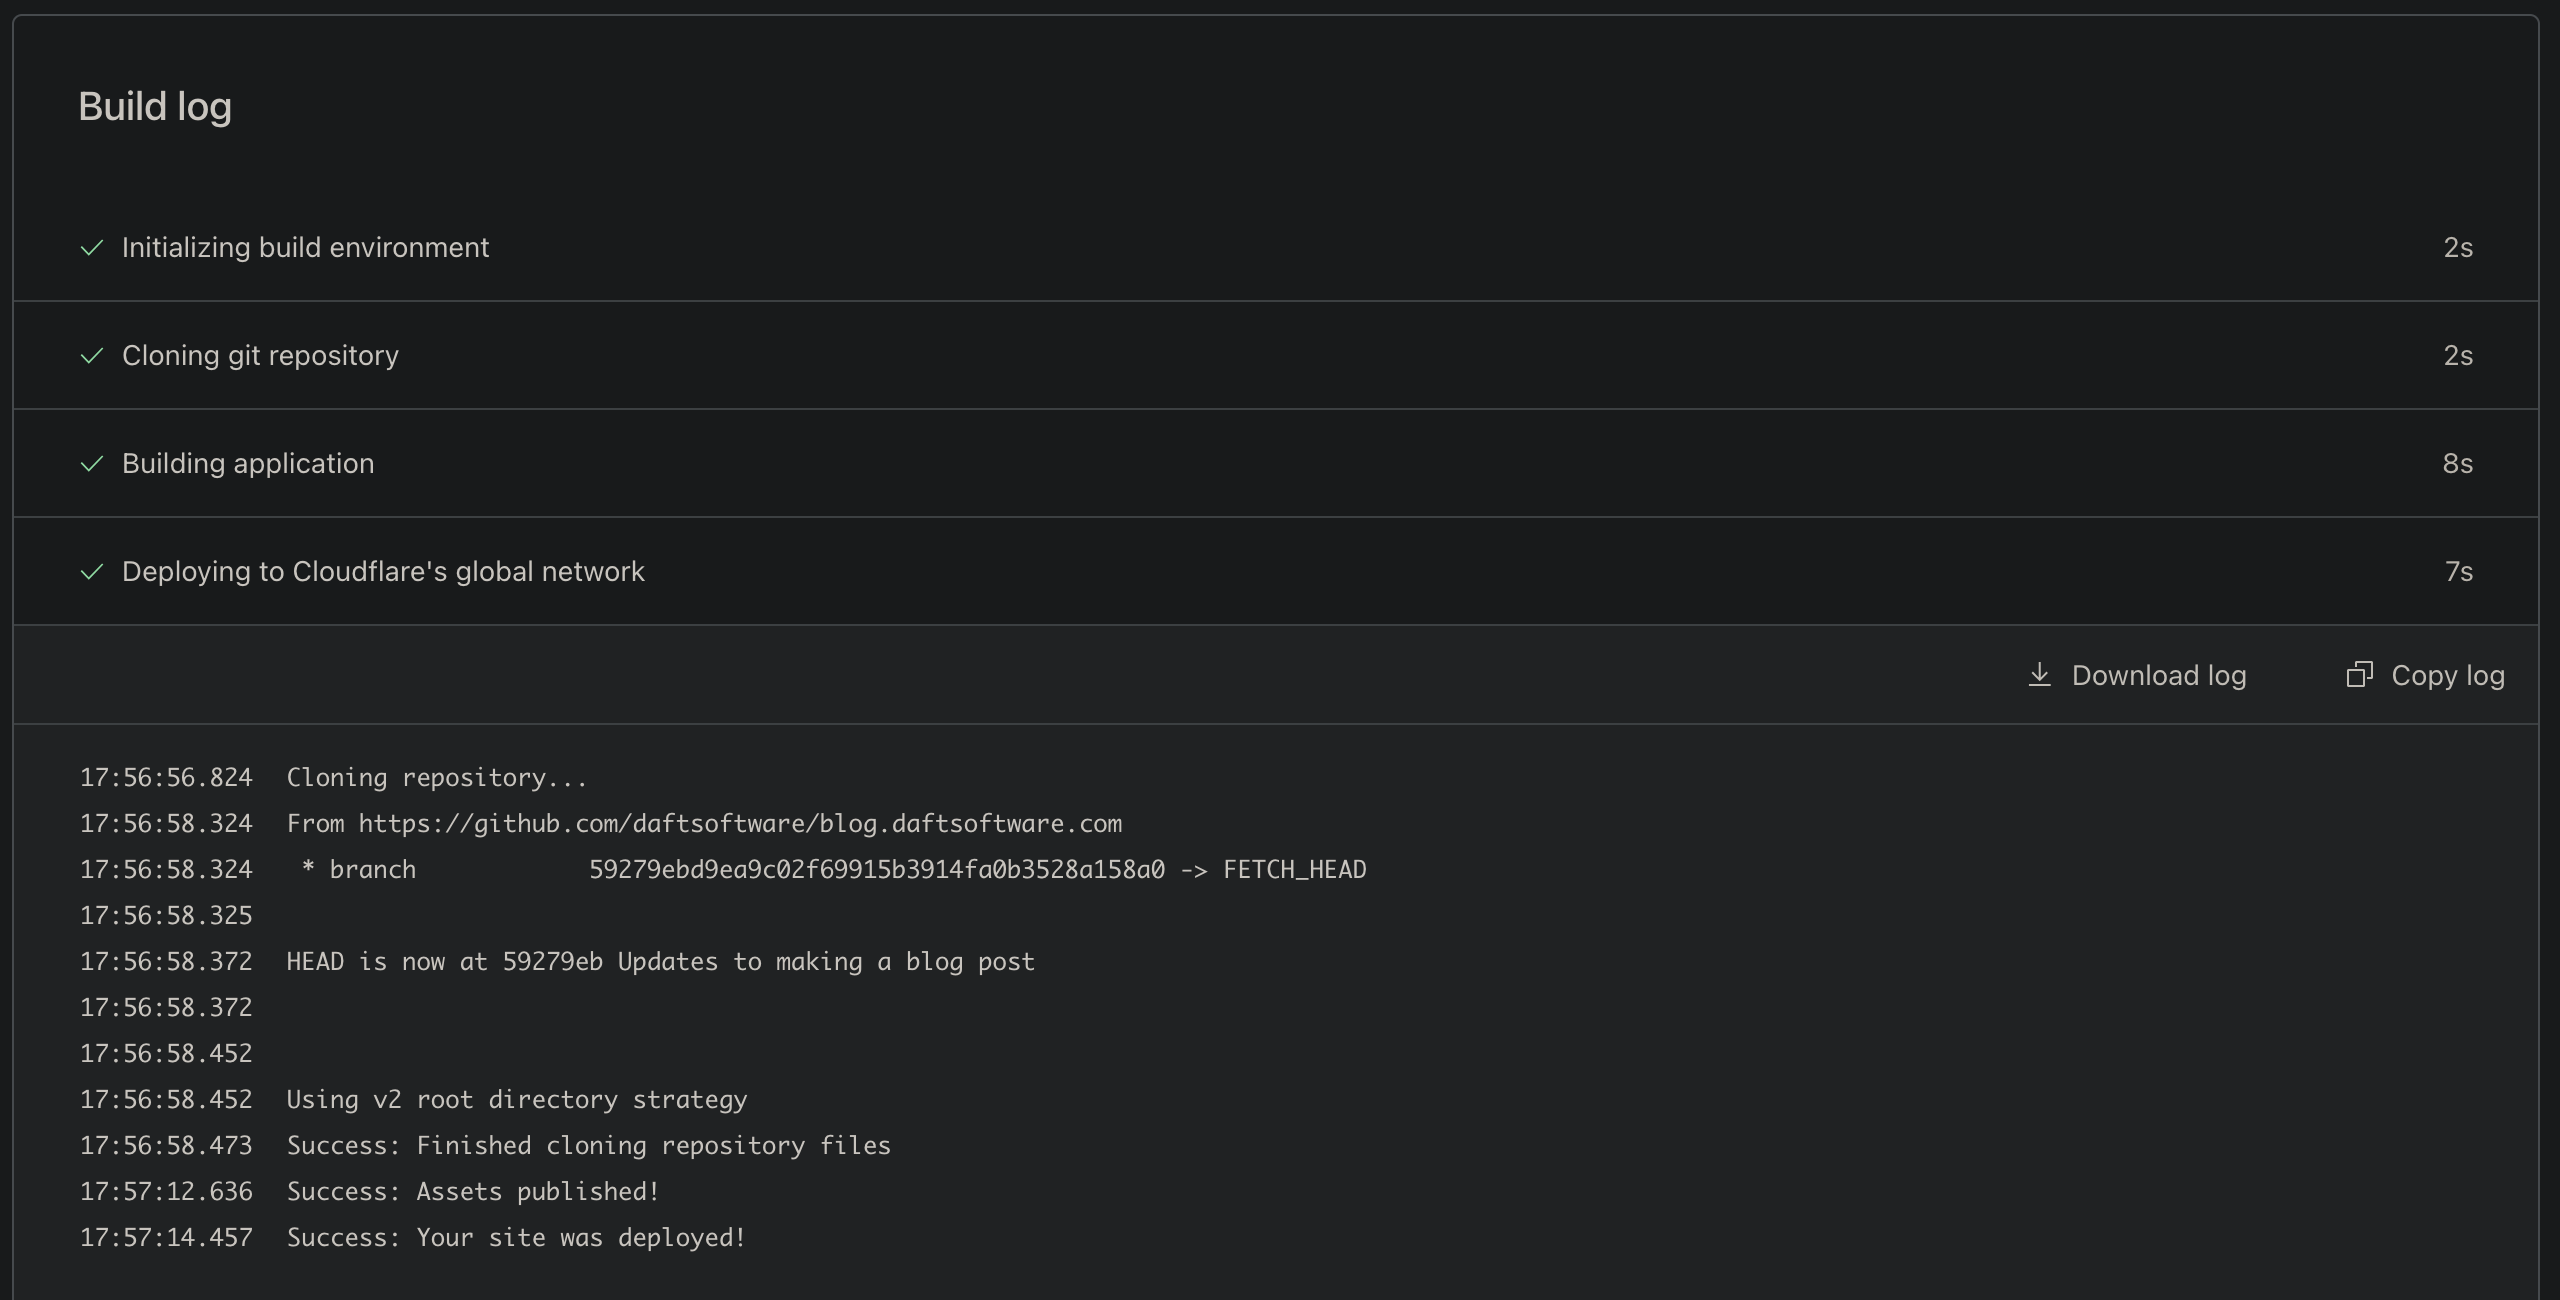
And now you can press the deploy button. If everything was successful you will see the deployment log succeed in uploading and then your site will be hosted at the link provided by cloudflare pages!
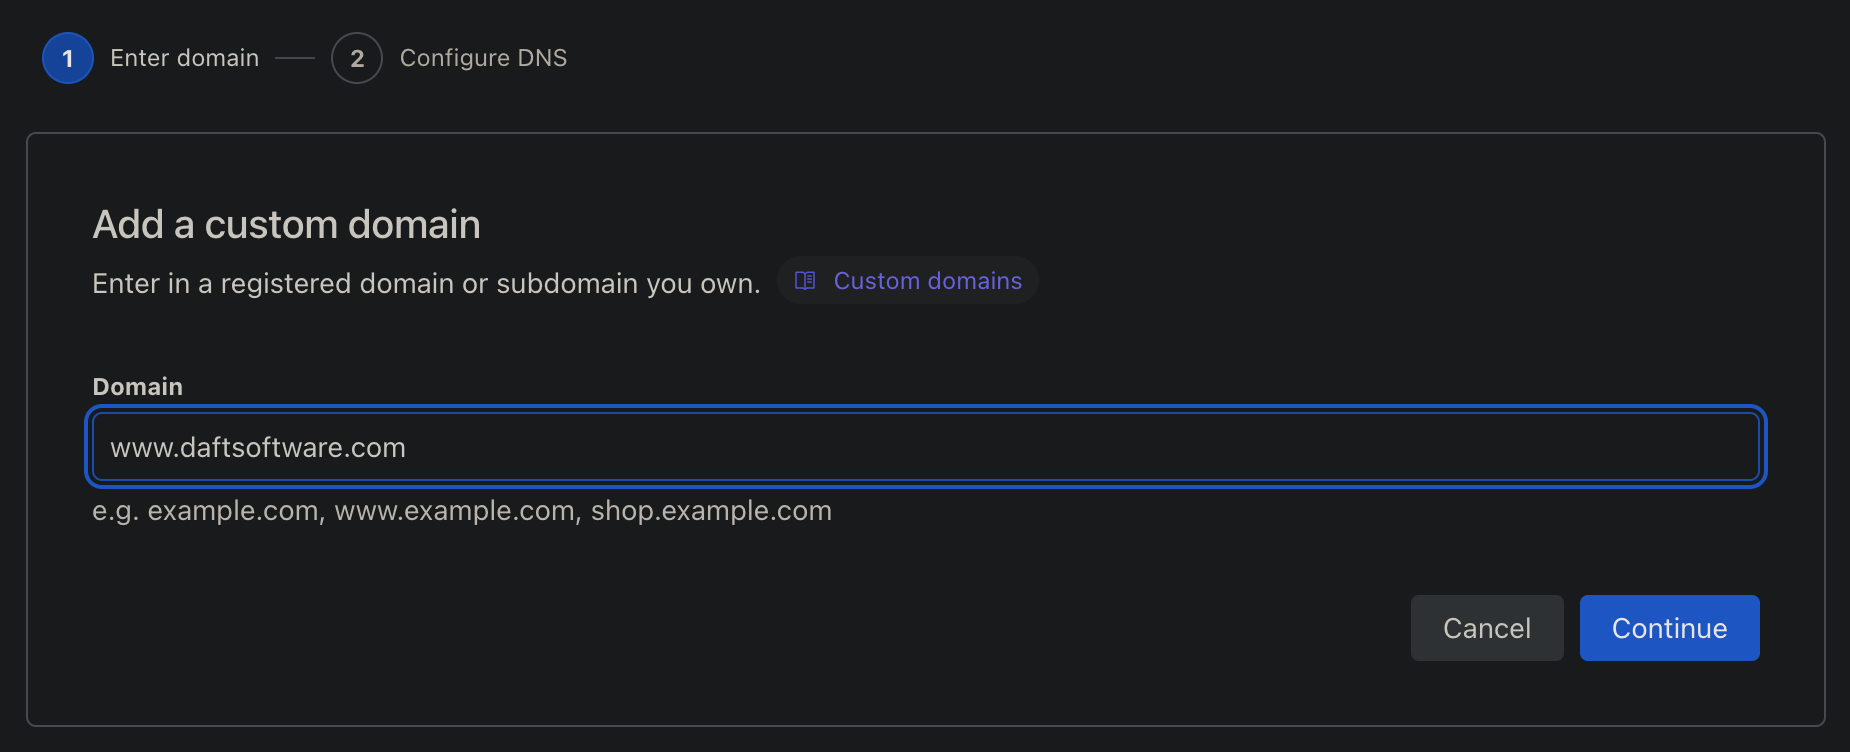
Linking our Domain
Among the options on this page is one to add a domain, luckily we already did this! So just enter your domain into the box eg blog.daftsoftware.com and then cloudflare will automatically add the CNAME record to our domain, just press “Activate domain”.

Updating our blog
Updating your blog is now incredibly easy, All you have to do is commit to your git repository, cloudflare pages will automatically detect this and push the update live!
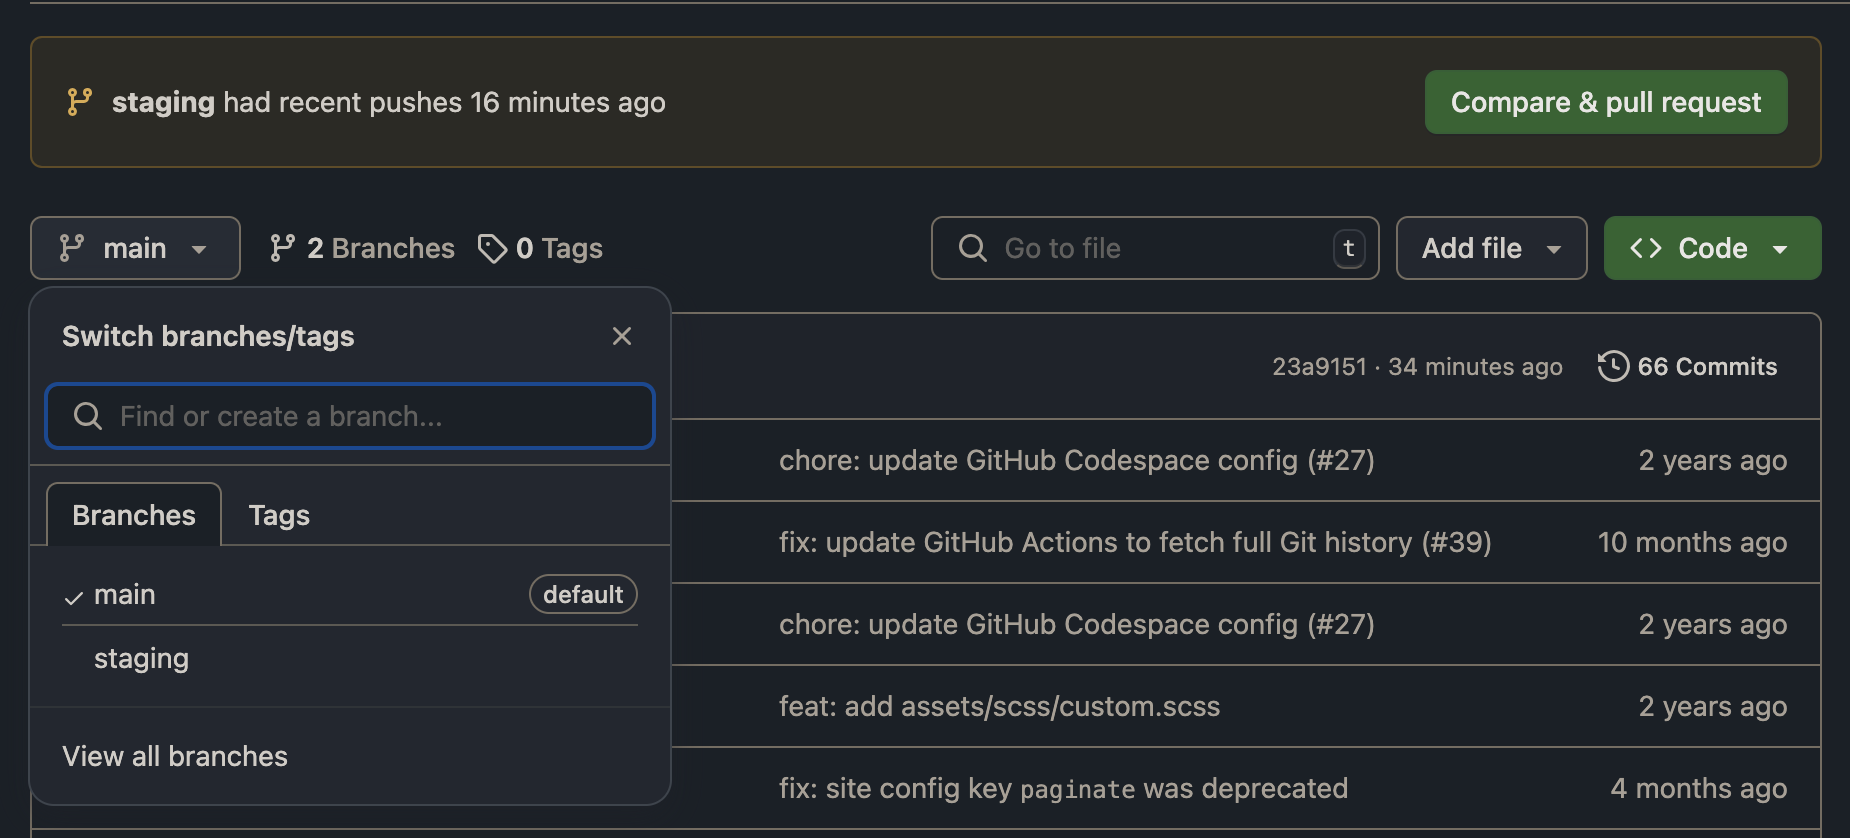
But lets say we want to not immediately push a blog post live, but to instead just preview our posts and how the site will look, how do we do that? We make a staging branch. Cloudflare pages has two modes, production and preview. Or main branch got setup as the primary branch to deploy our site from, so now we should create a new branch with git checkout -b staging, and we can start adding new posts to this branch. You can even have multiple branches for multiple post if you like!
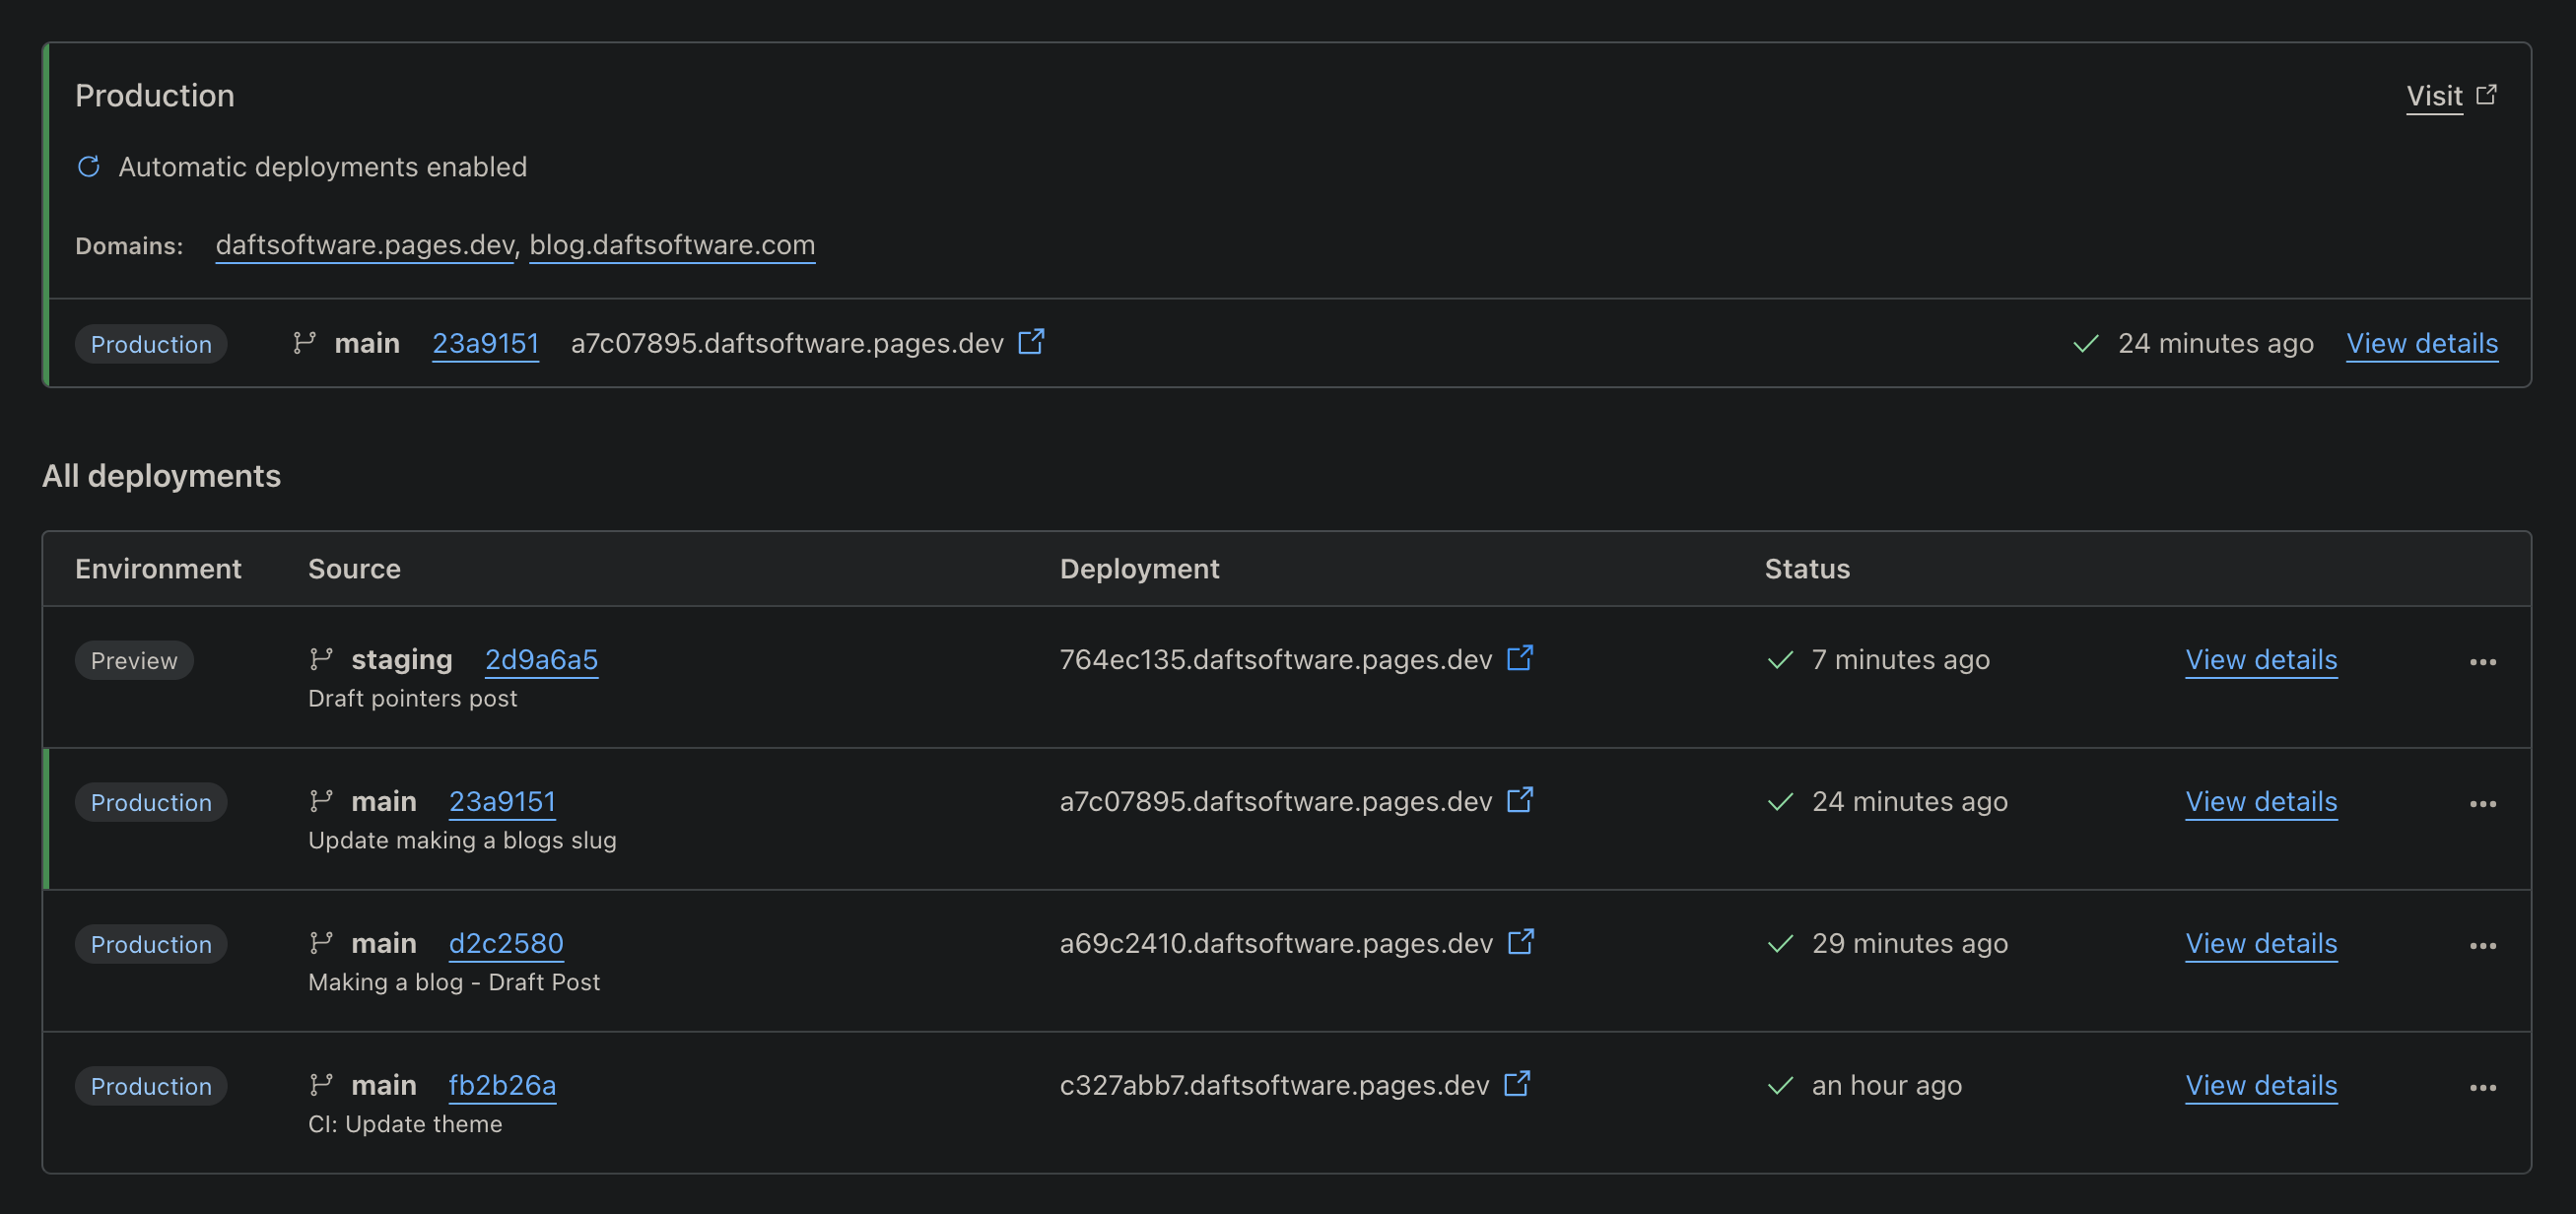
Now whenever you push to any branch that isn’t main, cloudflare pages will deploy this as a preview site, which you can view by going to the cloudflare pages dashboard, opening your page, and under deployments you will see previews for any other branch you have and open the temporary url it provides to see this preview of your site.
That’s all! Enjoy your new blog, thanks for reading.